

A Guide to Setting Up QuickBooks Online for Service Businesses
Getting your QuickBooks Online account set up involves a lot more than just plugging in your company name and calling it a day. A truly solid setup means you’re customizing your chart of accounts, connecting your bank feeds, and defining who can see what from the very beginning.
When you take the time to do this right, you’re building a system that delivers accurate financial data. This saves you from countless hours of cleanup down the road and, more importantly, gives you the confidence to make smart business decisions.
Why a Smart QuickBooks Setup Is Your Financial Foundation
Think of your QuickBooks account as the financial blueprint for your service business. If you rush through the setup or just stick with the generic defaults, it’s like building a house on a shaky foundation. Sooner or later, cracks are going to appear.
In the world of bookkeeping, those cracks look like confusing reports, bank reconciliations that never quite add up, and a frustrating lack of clarity right when you need it most.
A thoughtful setup, on the other hand, transforms QuickBooks from a simple data-entry tool into the nerve center of your financial intelligence. It gives you the real-time data you need to answer critical questions on the fly. Are your projects actually profitable? Is cash flow healthy enough to bring on a new hire? Which one of your services is bringing in the most revenue?
The High Cost of a Poor Setup
I’ve seen it happen time and again: a business owner flies through the initial setup, only to realize a year later that their books are a complete mess. This almost always ends with an expensive call to a professional for a major cleanup project—which costs far more than just getting it right from the start.
Every choice you make at the beginning, from your accounting method to the expense categories you create, has a ripple effect on every single report you pull.
For a service-based business, this kind of precision isn’t just nice to have; it’s non-negotiable. You have to track project costs, keep an eye on billable hours, and analyze profitability by client or service line. A generic, out-of-the-box setup just can’t give you that level of insight.
The goal isn’t just to record transactions. It’s to build a system that tells the financial story of your business clearly and accurately. Avoiding the common pitfalls from day one prevents the kind of back-office chaos that holds your business back instead of helping it grow.
Connecting Your Choices to Long-Term Success
The real power of a well-configured system becomes obvious when you see how smoothly everything starts to work together. A proper setup makes integrating payroll a breeze, massively simplifies tax prep, and creates a financial back office that can actually scale with your business.
It’s no wonder over 7 million businesses around the world rely on QuickBooks. The platform holds a staggering 62.23% market share in the U.S. small business accounting software space. And with about 80% of users on the Online version, it’s clear that business owners want clean, accessible financial data from anywhere. You can read more about how QuickBooks dominates the market over on acecloudhosting.com.
To truly build that strong foundation, it helps to understand the principles behind good bookkeeping. Getting a handle on these concepts ensures your setup aligns with sound accounting practices from the get-go. For a great primer, check out this guide on bookkeeping basics for small business. Investing a little time upfront will pay off in a big way, creating a dependable system that fuels your growth.
Configuring Your Company File for Accurate Reporting
Once you’ve picked your plan and logged in, you’ll land on the main dashboard. This is where the real work begins. It’s so tempting to just click through the initial settings to get started, but trust me, every choice you make here has a ripple effect on your financial reports down the road.
Think of this part of the process as laying the foundation for your financial house. If the foundation is crooked, everything you build on top of it will be, too.
Your first stop should be the Company Settings, which you can find by clicking the little gear icon in the top right. This isn’t just about plugging in your business name and address. You’re about to define the core DNA of your company inside QuickBooks, and for a service-based business, getting these details right from the jump is a game-changer.
Defining Your Business Structure and Fiscal Year
QuickBooks will ask for your industry and company type (like Sole Proprietor, S-Corp, etc.). Don’t just pick something generic. Selecting “Marketing Consulting” instead of “Business Services” will give you a much better starting Chart of Accounts, saving you a ton of cleanup work later.
Next, you’ll set your fiscal year. Most small businesses stick with the calendar year (January 1 to December 31) because it lines up perfectly with tax season and keeps things simple. However, if your business is highly seasonal—say, you’re a landscape designer who’s busiest in the spring and summer—you might choose a fiscal year-end that better reflects your natural business cycle.
The point is to make a conscious decision here, not just accept the default.
Cash vs. Accrual: What’s Right for You?
This is one of the most critical decisions you’ll make in the setup process: choosing your accounting method. QuickBooks gives you two choices:
- Cash Basis: Super straightforward. You count income when the money hits your bank and expenses when the money leaves. It’s a direct reflection of your cash flow.
- Accrual Basis: This is a bit different. You recognize income when you earn it (when you send the invoice) and expenses when you incur them (when you receive a bill), regardless of when cash actually changes hands.
For almost every service business I’ve worked with, accrual accounting gives a much truer picture of financial health. It shows you who owes you money (Accounts Receivable) and who you owe (Accounts Payable), which is absolutely essential for managing cash flow. Most CPAs will nudge you in this direction for a good reason.
This initial decision-making phase is the first step toward a system that doesn’t just track numbers but fuels actual growth.
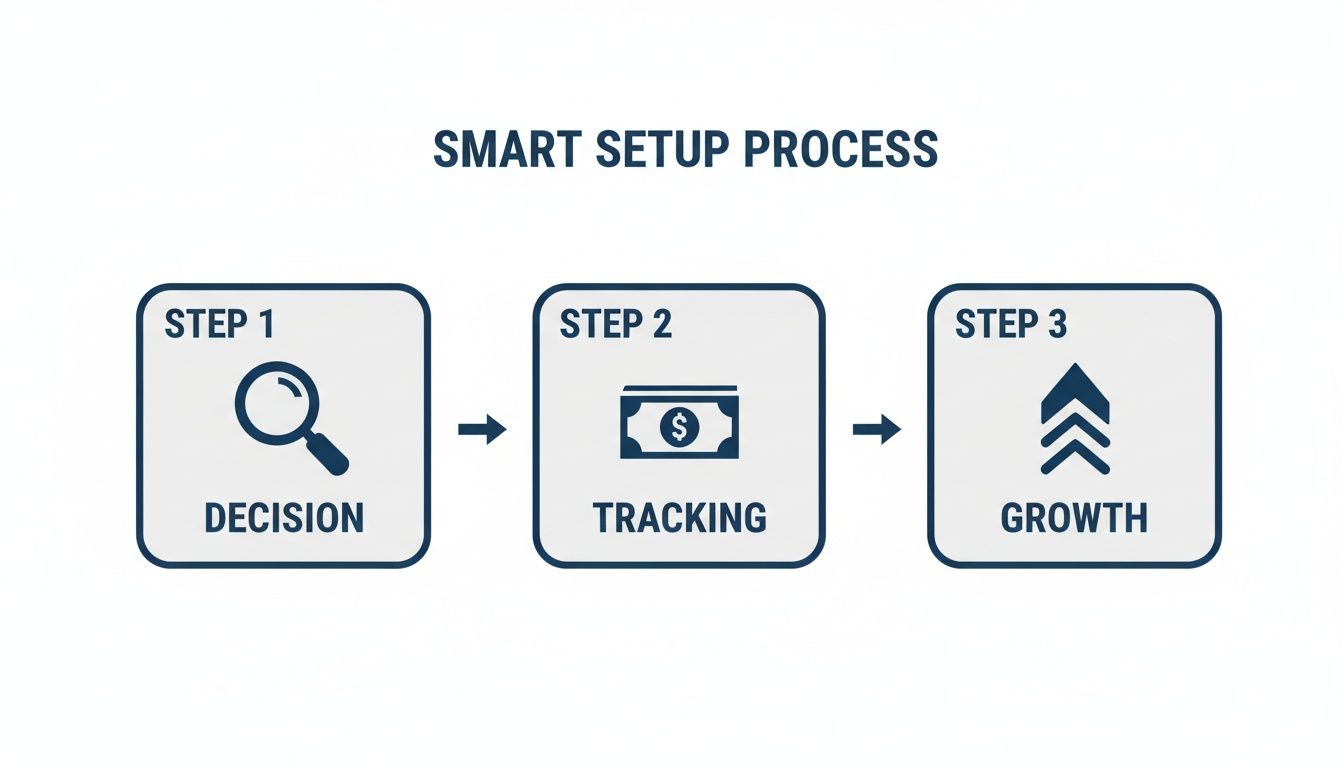
It’s a simple flow: smart decisions upfront lead to better tracking, which gives you the insights you need to grow your business.
Activating Essential Features
The settings dashboard is also where you switch on the features that make QuickBooks so powerful. Don’t assume everything is enabled by default. You need to proactively turn on the tools that matter most to a service business.
Accurate reporting is built on clear internal procedures; this guide on how to document business processes can help ensure your QuickBooks data is consistently managed.
Take a few minutes to explore the Sales and Expenses tabs within the settings. Here, you can customize how your invoices look, turn on sales tax tracking (if you sell taxable services or products), and enable features like purchase orders if you manage projects with big upfront costs.
This initial setup might feel a bit tedious, but it’s the bedrock of everything to come. For service business owners, getting through the initial sign-up, data import, and settings customization usually takes about 30-60 minutes. That one hour unlocks critical functions like AP/AR management and month-end reporting used by the vast majority of QuickBooks users.
By carefully working through each option now, you ensure that every transaction you enter from this point forward will be categorized correctly, leading to financial reports you can actually depend on.
Customizing Your Chart of Accounts for Clearer Insights
If you treat the Chart of Accounts as just a list of generic categories, you’re missing out on the single most powerful tool for financial clarity inside QuickBooks.
Think of the default Chart of Accounts (COA) that QuickBooks gives you as a generic, one-size-fits-all t-shirt. Sure, it technically works, but it rarely fits your business well. For a service business, a customized COA is the difference between a vague financial summary and a detailed story that tells you exactly where your money is coming from and where it’s going.
When first setting up QuickBooks Online, so many owners just accept the standard COA without a second thought. This is a huge mistake. A generic setup lumps all your hard-earned revenue into a single “Sales” or “Services” bucket, making it impossible to see which of your offerings is actually driving growth.

Our goal is to turn this basic list into a strategic tool. The right structure helps you pinpoint your most profitable services, spot runaway costs, and make smarter, data-backed decisions about where to invest your time and resources.
Building Income Accounts That Tell a Story
The very first place to customize is your income. Lumping all your revenue together is like trying to drive across the country without a map. Instead, create specific income accounts that mirror what you actually sell. This lets you run a Profit & Loss report that gives you immediate, actionable insights.
For a marketing agency, for example, that might look something like this:
- 4100 – SEO Services: Revenue specifically from your search engine optimization projects.
- 4200 – Content Marketing Retainers: All the monthly recurring revenue from your content clients.
- 4300 – PPC Management Fees: Income earned from managing pay-per-click ad campaigns.
This level of detail instantly reveals what percentage of your total income each service line contributes. You might discover that while PPC management feels busy, your SEO services are far more profitable, giving you a clear signal to focus your sales efforts there.
The real power of a customized Chart of Accounts isn’t just about organizing data for tax time. It’s about creating a living financial dashboard that helps you run your business more effectively every single day.
When you create these accounts, stick to a logical numbering system. Most accounting pros recommend using the 4000 series for income accounts. It’s a standard practice that not only keeps your COA clean but also makes it instantly understandable for any bookkeeper or CPA who looks at your file. To dive deeper into the fundamentals, our guide on how to create a chart of accounts offers a solid framework.
Detailing Expenses to Manage Key Cost Drivers
Just as important as detailing your income is breaking down your expenses. The default “Office Expenses” or “Utilities” categories are way too broad. How can you control costs if you don’t know what you’re actually spending money on? A tailored expense structure gives you the visibility you need.
Focus on the major cost drivers for a modern service business. Generic categories from a decade ago just won’t cut it anymore.
Actionable Expense Categories for Service Businesses
| Category Number | Account Name | Description & Purpose |
|---|---|---|
| 6100 | Software Subscriptions | Tracks all your recurring SaaS costs (e.g., CRM, project management tools, Adobe Creative Cloud). This helps you audit for unused licenses. |
| 6200 | Contractor Payments | Separates payments to 1099 contractors from employee payroll, which is critical for budgeting and tax compliance. |
| 6300 | Marketing & Advertising | Breaks down your ad spend by platform (e.g., Google Ads, LinkedIn Ads) for clear ROI analysis. |
| 6400 | Professional Development | Tracks investments in team training, courses, and certifications, highlighting your commitment to growth. |
By structuring your COA this way, you move beyond simple bookkeeping. You’re actually building an analytical framework directly within QuickBooks. At the end of the month, you won’t just see a total expense number; you’ll see a precise breakdown that lets you ask strategic questions. Is your software spend creeping up? Are contractor costs aligned with project revenue? Answering these becomes effortless.
This customization is a foundational step in a proper QuickBooks Online setup, turning a basic accounting tool into your business’s most valuable source of financial intelligence.
Automating Your Finances with Bank Feeds and Data Migration
This is where the magic really happens. Connecting your bank and credit card accounts to QuickBooks Online is the single biggest step you can take to transform your financial workflow. Forget manual data entry—this creates a direct pipeline from your bank right into your books, slashing tedious work and dramatically reducing the risk of human error.
Once everything is linked up, every single transaction that clears your bank—client payments, software subscriptions, even that morning coffee run—will pop up automatically in your QuickBooks “For Review” list. This feature alone is a huge time-saver, but the real power comes from teaching QuickBooks how to handle your routine transactions for you.

Mastering Bank Rules for Ultimate Efficiency
The goal isn’t just to pull in data; it’s to automate how that data gets categorized. We do this by creating Bank Rules. Think of a bank rule as a simple “if this, then that” instruction you give QuickBooks. You set it up once, and it works for you forever.
For example, you can create a rule that says any transaction containing “Adobe Creative Cloud” in the description should always be posted to your “6100 – Software Subscriptions” expense account. Once that rule is live, you’ll never have to touch that specific expense again.
Common Bank Rules for Service Businesses
- Recurring Software: Set rules to automatically assign vendors like Google Workspace or your CRM to the correct software expense account.
- Contractor Payments: If you pay a contractor a consistent amount each month, create a rule to categorize those payments straight to your “Contractor Payments” account.
- Client Deposits: Teach QuickBooks to recognize deposits from specific clients and automatically apply them as revenue to the right income account.
By investing just 30 minutes to set up rules for your top 10-15 recurring transactions, you can automate the categorization of up to 80% of your monthly activity. This doesn’t just save hours; it enforces consistency, which is absolutely critical for accurate reports.
Connecting bank feeds is the first step, but creating bank rules is what turns QuickBooks into a truly automated system. It’s the difference between having a pile of receipts and having a self-organizing financial file cabinet.
Migrating Historical Data without the Mess
If you’re switching to QuickBooks from another system or a bunch of spreadsheets, you need a clean slate. This is your chance to avoid the classic “garbage in, garbage out” trap. Before you even think about importing anything, take the time to clean up your existing data.
This means making sure your customer list doesn’t have duplicates and that all contact info is up to date. If you’re importing opening balances, double-check that those numbers are from a fully reconciled period. Starting with wonky balances will sabotage your reports from day one.
A well-planned data import is a cornerstone of a reliable setup. It’s a huge draw for the 30,789 verified companies that use QuickBooks Online globally. They rely on its ability to automate bank feeds and import historical data cleanly. This trust is a key reason it holds a dominant 62.23% market share and why 80% of its 7 million users choose the Online version for its real-time access.
The key is to be meticulous. Import your data in a logical sequence:
- Chart of Accounts: Your custom account list goes in first.
- Products & Services: Define what you actually sell.
- Customer & Vendor Lists: Bring in all your contacts.
- Opening Balances: Use a journal entry to set your starting financial position.
Taking these steps ensures your new QuickBooks file is built on a rock-solid foundation of clean, reliable data. Once your data is in and your bank feeds are running, the next crucial step is making sure it all stays in sync. To learn more about that process, check out our guide on how to reconcile bank accounts.
Integrating Payroll and Managing Team Permissions
For any service business, your team is your biggest asset—and usually your largest expense. This isn’t just a line item on a report; it’s the engine of your company. That’s why getting payroll integrated perfectly with your QuickBooks Online setup is non-negotiable.
When done right, a solid payroll integration gives you accurate job costing, clean financial statements, and a back-office that can actually scale with you. Mess it up, and you’re looking at messy books and bad data.
Let’s walk through two of the best solutions for service businesses: the built-in QuickBooks Payroll and the powerful third-party platform, Gusto. We’ll also cover how to manage who sees what in your QBO account, which is crucial for keeping your financial data secure as you grow.
Choosing Your Payroll Platform
The decision between QuickBooks Payroll and Gusto really boils down to a choice between ultimate simplicity and more robust HR features. There’s no wrong answer here, but one is likely a better fit for where your business is today and where you plan to take it.
QuickBooks Payroll is the native option, meaning it’s baked right into the QBO system. The setup is lightning-fast, and your data syncs instantly because it never has to leave the ecosystem. Payroll journal entries post automatically, and all your tax payments and filings are handled inside the same interface you use for everything else. Its biggest advantage is its seamless simplicity.
Gusto, on the other hand, thinks of itself as a “People Platform.” While it does payroll exceptionally well, it also offers a much deeper set of HR tools. We’re talking about employee onboarding workflows, benefits administration across all 50 states, and stronger HR compliance support. The integration with QuickBooks Online is top-notch, but it’s still an external connection that you’ll need to set up and map to your chart of accounts.
Your choice of payroll system impacts way more than just payday. It affects your ability to generate accurate profitability reports, manage employee benefits, and maintain compliance, making this a key decision in your QuickBooks Online setup.
If you’re just starting out or your top priority is the most straightforward workflow possible, QuickBooks Payroll is a fantastic choice. If you’re looking to build out a more formal HR function from day one, Gusto provides a platform that will grow with you.
Payroll Integration Options: QuickBooks Payroll vs. Gusto
To really see the difference, it helps to put them side-by-side. Think about your immediate needs for paying your team, but also consider what you’ll need in a year or two as you hire more people.
Here’s a quick comparison to help you decide which platform aligns best with your business goals:
| Feature | QuickBooks Payroll | Gusto |
|---|---|---|
| QBO Integration | Native. Data syncs instantly within the same system. | Deep Integration. Requires initial setup but syncs payroll data reliably. |
| Core Payroll | Strong and reliable, with tax filings and direct deposit included. | Excellent, with flexible pay schedules and unlimited payroll runs. |
| HR Tools | Basic employee management and workers’ comp administration. | Advanced onboarding, offer letters, and employee directories. |
| Benefits | Offers health benefits and retirement plans through partners. | Extensive benefits brokerage for health, dental, vision, and 401(k). |
| User Experience | Functional, lives within the familiar QuickBooks interface. | Modern and employee-friendly, highly rated for ease of use. |
Ultimately, both are excellent tools. The right one depends on whether you need a simple, integrated payroll solution or a more comprehensive HR and benefits platform.
If you decide the native solution is the right fit, we have a complete walkthrough that breaks down the entire process. You can find the step-by-step guide on how to set up QuickBooks Payroll here.
Setting Up User Roles and Permissions
As your business grows, you won’t be the only one who needs access to QuickBooks. You might need to add your CPA, a bookkeeper, or even a project manager who needs to see job profitability. But giving everyone full admin access is a huge security risk and a surefire way to end up with errors in your books.
This is where QuickBooks Online’s user permissions are a lifesaver. You can give people access to only the specific areas they need to do their jobs, without letting them see sensitive data like bank balances or what everyone on the team earns.
You can find these settings under Manage Users. From there, you can assign specific roles:
- Company Admin: Full access to absolutely everything. This should be reserved for owners only. Period.
- Standard User: This is a customizable role. You can grant access to just customers and sales, just vendors and purchases, or both—all without them seeing your bank accounts.
- Reports Only: Perfect for an advisor or department head who needs to monitor performance but has no reason to edit transactions.
- Time Tracking Only: Ideal for employees or contractors. They can log their hours for payroll and invoicing, and that’s it.
By taking a few minutes to assign these roles thoughtfully, you protect the integrity of your financial data while still empowering your team to work effectively. It’s a critical piece of a secure and well-managed QuickBooks setup.
Common Questions About QuickBooks Online Setup
Even with the best guide in hand, you’re bound to have questions pop up while you’re in the weeds of your QuickBooks Online setup. That’s perfectly normal. Getting the details right from the start is far more important than getting it done fast.
Let’s walk through some of the most common hurdles I see service business owners run into. Think of this as your go-to reference for those moments when you’re wondering, “Am I actually doing this right?”
How Long Does It Realistically Take to Set Up QuickBooks Online?
Sure, you can create an account and plug in the basics in about an hour. But a proper setup? That’s a different animal entirely. For most service businesses, you should block out a solid 3 to 5 hours for a thorough initial configuration.
What does that time actually get you? It’s your chance to:
- Customize your Chart of Accounts so it actually reflects your unique service lines.
- Connect all your bank and credit card feeds without feeling rushed.
- Build a smart set of bank rules that will automate most of your future bookkeeping.
- Clean up and import your client and vendor lists so they’re accurate from day one.
Putting in this focused time upfront is one of the single best investments you can make in your business. It will literally save you dozens of hours of frustrating manual data entry and expensive cleanup work later on. For businesses with years of messy historical data, a pro might even spend a full day getting every last detail just right.
Can I Switch from QuickBooks Desktop to Online?
Absolutely. Making the jump from Desktop to Online is a well-worn path. Intuit even provides a migration tool to help you move your company file over. But—and this is a big but—it’s rarely a simple one-click affair. A smooth transition is all about careful prep work.
Before you even think about migrating, you have to clean up your Desktop file. That means reconciling every single bank, credit card, and loan account down to the last penny. Be aware that some data, like granular payroll details or inventory assemblies, just doesn’t transfer over perfectly.
A word of advice: if you have several years of data, work with a professional who has managed dozens of these migrations. They know exactly where the landmines are and how to navigate the inevitable quirks of the process for a seamless switch.
What Are the Most Common Mistakes to Avoid During Setup?
I’ve seen it all, and a few key mistakes pop up time and time again. If you can sidestep these three common pitfalls, you’ll be miles ahead of the game and have books you can actually trust.
- Using the Generic Chart of Accounts: This is, without a doubt, the biggest mistake I see. The default account list is way too vague and lacks the detail a service business needs to track profitability by client or service type. It’s a recipe for useless reports.
- Not Creating Bank Rules: Skipping this step guarantees that bookkeeping will be a tedious, manual slog every single month. Taking the time to set up rules automates the vast majority of your transaction coding. Don’t skip it.
- Incorrectly Recording Owner Investments: This one can really mess things up. Many new owners mistakenly classify the money they put into the business as “Sales” or some other form of income. This immediately skews all your financial reports. It must be recorded as an owner’s equity contribution.
Which QuickBooks Online Plan Is Best for a Service Business?
For the vast majority of growing service-based businesses, the QuickBooks Online Plus plan is the sweet spot. It offers the best mix of genuinely useful features for the price.
The big win with the Plus plan is project profitability tracking—an absolute must-have for agencies, consultants, and any business managing distinct projects. You also get access to much more detailed reporting. While the Essentials plan can work for a solo operator just starting out, most businesses outgrow its limitations very quickly. Advanced is typically overkill unless you have a larger team and need complex user permissions and workflow automation.
A proper QuickBooks Online setup is the first step toward financial clarity. If you want to ensure your books are built on a rock-solid foundation from day one, the expert team at Steingard Financial is here to help. We specialize in setting up and managing QuickBooks for service businesses, giving you accurate data you can trust. Learn more about our bookkeeping and payroll services.